Database Setup
Installing MySQL
MySQL Installer
-
Download and open the MySQL Installer.
-
Select the Server Only option and click next, then click execute.
-
You can keep clicking next until Accounts and Roles step of
Configuration, make sure to add a password and remember it, you will need it later. You can ignore the add user option. -
Keep clicking next and finish the setup.

Docker
Alternatively, you can run your MySQL server inside a Docker container.
-
Download and install Docker.
-
Create a file named
docker-compose.ymlin the root of your folder.version: "3.9"
services:
mysql:
container_name: mysql
image: mysql
restart: always
build:
args:
DATABASE_USERNAME: ${DATABASE_USERNAME}
DATABASE_PASSWORD: ${DATABASE_PASSWORD}
environment:
MYSQL_ROOT_PASSWORD: ${DATABASE_PASSWORD}
volumes:
- ./data:/var/lib/mysql
- ./logs:/var/log/mysql
ports:
- ${PORT}:${PORT}
expose:
- "${PORT}" -
Create a file named
.envin the root of your folder.PORT=3306
DATABASE_HOST=mysql
DATABASE_USERNAME=root
DATABASE_PASSWORD= -
Run
docker compose upto start the container. The Docker images will be fetched and container built when run for the first time. -
Run
docker psto confirm that the container is running.
Optional (Recommended)
Database GUI
Download a compatible database GUI tool. This will help you delete your database (DROP) as server updates might require you to do this. Also, you can view or edit the server data in the database.
A tested and recommended tool is DBeaver.
DBeaver
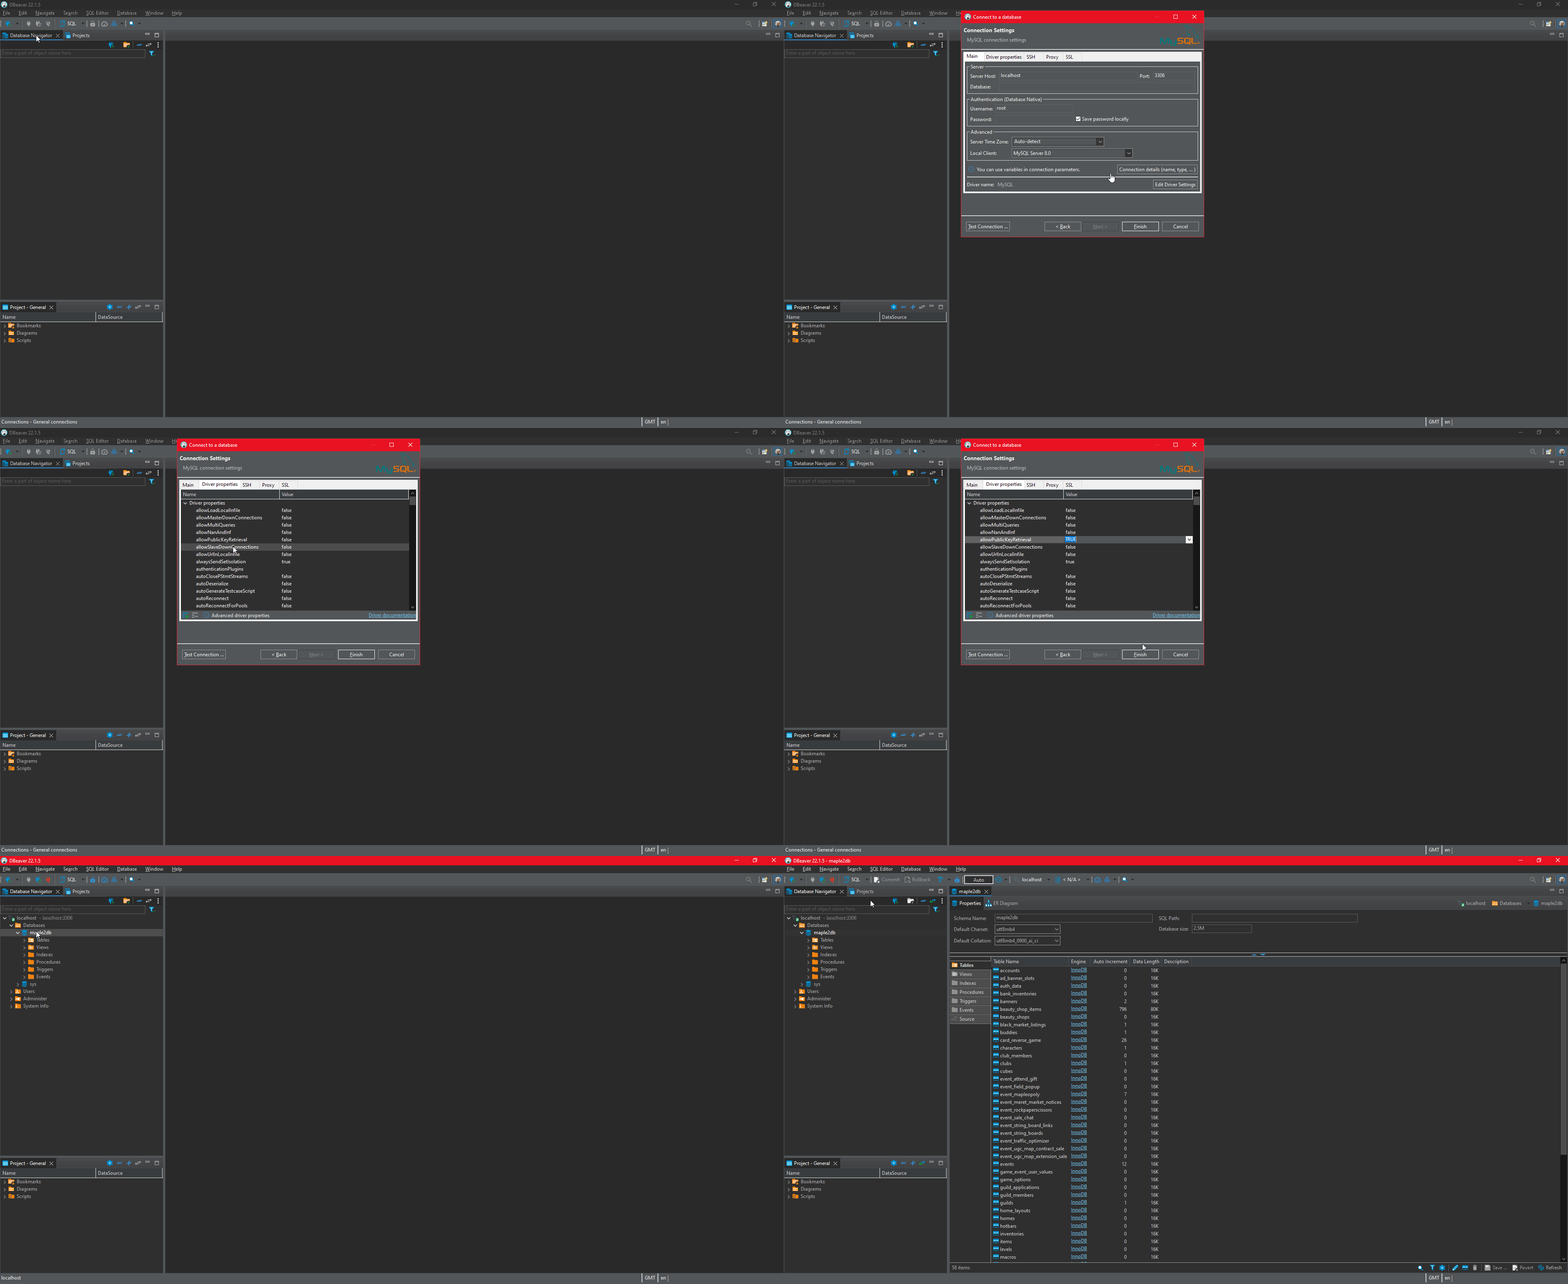
- Open DBeaver, click on the 'New Database Connection' icon on the top left.
- Select MySQL and click next.
- Add the database (Maple2DB), username and password then click finish.

Visual Studio Code
-
Download the Visual Studio Code extension
MySQLbycweijan. -
Add a new connection to the chosen compatible SQL database previously installed, in
Visual Studio Codethis can be done by clicking the icon calledDatabaseon the left side, then click the plus icon on the top of the side panel. -
Add database, username and password then click finish.